Posted in artificial intelligence, the future of work

Learning to Use Midjourney: 3 Things I was Excited to Learn

An AI art platform

Sticker image generated by author using MidJourney

Do you know how to use Midjourney?

The other night, I was hanging out with a friend, and I was telling her about my new projects on Midjourney. She then asked, “What’s that?”

You know how sometimes we can get so familiar with what we know that we assume others know it, too?

Well, it gave me pause to realize that maybe not everyone knows about Midjourney yet. 

As of July, Midjourney had around 15 million users, which, compared to the size of the 8 billion world population, is relatively small. 

So chances are, there are people in your life who have never heard of Midjourney. Including maybe you. 

Disclaimer: I’m not an expert, but I will share some of the things I’ve learned and am still learning with you here. 

What is Midjourney?

Essentially, it is a generative artificial intelligence (AI) program that takes prompts as inputs to create images. You tell it what you want it to create and out pops 4 different images. 

Is it free to use Midjourney?

Yes and no. There is a free option with limited options, but I personally like using the basic subscription for $10/month. From there I can create images in my own chat discussion with the Midjourney bot.

plan showing the costs to use Midjourney, ranging from $10/month to $120/month
Screenshot of the Midjourney subscription plans

Let’s take a look at how it works:

When you open the discord server, you will be able to create prompts in chatrooms. You type /imagine …. followed by the prompt for your image.

Prompt: /imagine vintage green floral design with leaves and stem minimal white background clipart. 

4 boxes with green flower clipart
Screenshot of Midjourney output

After inputting your prompt, you will get 4 different image options to choose from. As you can see, it’s not perfect since I asked for a white background and one of the images does not have a white background. 

There are so many potential keywords and combinations that you can use. Once those 4 images are generated, you have the option to upscale the one you want to use, or create variations of your favorite one. 

four possible Halloween coloring book covers with pumpkins
screenshot of Midjourney output

The numbers correspond to:

Top left: 1, Top right: 2, Bottom left: 3, Bottom right: 4

Why do you need to upscale the images?

You may wish to use the image in a larger format or sell as clipart or on a printable. The importance of using a good upscaler is so that you don’t lose resolution are have it look to pixelated the larger it gets. 

From everything I’ve read and watched, Midjourney doesn’t currently have the option to upscale it enough to have that high quality. Therefore, a third-party upscaling site is usually recommended. 

3 things I was excited to learn about in Midjourney:

  1. You can change the aspect ratio to be landscape or portrait to match the goals of your image. Use two dashed and ar and then the ratio you are trying to achieve.
screenshot of ar prompt in Midjourney

2. Use brackets to create multiple images with the same prompt all in one command. Basically you create your prompt as you want it to be. This may take several test iterations. And then you use {book, pumpkin, broom, etc.}. Instead of having to copy and paste the prompt for each item, you can use the curly brackets and it will make all of them at once. 

Midjourney output of pumpkins and books

3. Use photorealistic and vivid imagery — the more you describe, the more detailed the image outcome is. Prompt from this list of “50 Midjourney Prompts to Create Photorealistic Art.

screenshot of Midjourney prompt and output of a waterfall 

I still have a long way to go before I’m an expert on creating AI art, but I’m excited to see where it takes me. 

Midjourney is just one of many platforms that can be used. Which one is your favorite?

Posted in Uncategorized

RankMath: The Powerful Tool That Helped Me More Than Double My Blog Traffic

Imagine if you could double or even quadruple your blog’s traffic. You’re probably thinking, “That’s so much traffic! How do I do that?” The answer to that question is simple: RankMath.

Note: links going to the RankMath website are affiliate links. I only post affiliate links to services or products that I absolutely believe in because this is not an affiliate website.

If you’re serious about blogging or running a business site, then it’s likely that you want to boost your traffic. Good for you! It’s a smart step towards creating an online business empire. However, there are so many different ways to go about doing this that it can be difficult to know where should you begin. Well, look no further, because this article is going to walk you through my experience using RankMath.

What is RankMath?

RankMath is a WordPress plugin I’ve recently started using, which has helped me more than double my blog traffic. It shows you how to write long-tail/head keywords for any given keyword. In essence, it helps you make your website as SEO-friendly as possible. For instance, if I wanted to rank for the keyword “make money blogging,” this plugin would tell me exactly what phrases to use in my content and on other relevant pages. It also walks you through all the steps to make your post more Google-friendly.

Over 1.5 million people use RankMath and I know why! It’s so user-friendly and has helped my blog traffic grow a lot even when I haven’t been posting as much. But is it free? Yes, there is a free version, but I didn’t think I could get everything I needed from the free version. So I upgraded to the PRO version, which is very affordable at only $129/year! And as you can see from the screenshot below, they are running a sale for the next 7 days (today is October 30th, 2022) for only $59. As my business grows, I will likely upgrade to the Business account.

Screenshot from the RankMath website showing the prices for each plan.

What does it do for you?

RankMath provides webmasters and content writers with powerful tools for improving their search engine optimization (SEO). Since it was first released, it has become the leading SEO plugin on the market. If you look at the ratings, it is excellent at 4.9.

Screenshot of the tools RankMath has to help you optimize your post.

It offers an easy to follow guide that lets you customize and optimize your post for maximum searchability. It’s so user friendly and colorful and I enjoy watching everything change from red to yellow to green. You enter in your keyword, keyword phrase, or multiple keywords. Here you can see that the current post is optimized at 62/100. The goal is to get as close to 100 as possible.

Once you optimize over 80, then it turns green. As you can see, there are several steps I still have to take to get myself closer to green.

As I’m typing now, the content is getting longer and the keyword density is decreasing. The last thing I do on all my posts is create my links to other content on my blog or external links.

At the end, if I think I don’t have enough media, then I’ll add another image or two and definitely make sure to have one as my thumbnail.

Content AI is super cool because it allows you to see how your post ranks compared to others using the keyword. When I use this feature, I often see a jump in my posts score through RankMath.

Another great feature is to analyze the title. For example, my original title was How I More Than Doubled my Blog Traffic Since Using RankMath. I was able to see that my title didn’t contain any strong words and didn’t have my keyword (RankMath) at the beginning.

I also used RankMath to edit and optimize my 100 old blog posts that were currently on my site. Truthfully, I still haven’t optimized everything yet, so I think I would have even more growth if I did. Here is the full transparency that you can see through the easy to use analytics dashboard. Just imagine how much traffic I would have if I optimized everything to good!

Screenshot of the Analytics dashboard showing that overall optimization is at 58.

Why I chose RankMath

Sometimes the best decisions are based on instinct. That was the case when I first encountered RankMath. I was feeling frustrated from an overall lack of growth in my site’s traffic, as well as some disappointment. I had tried using Monster Insights, but it wasn’t working so well for me.

I did some research and decided to give RankMath a try and I haven’t been disappointed. It seemed to be the easiest to use out of the different plug-ins available. And for someone who is still learning SEO, easy was what I was looking for.

Not to mention, any time I have had a question or problem, they are so quick to respond and solve the issue. They are constantly making updates to enhance user experience and make the tool even better.

My traffic since using RankMath

Since I started using RankMath in May 2022, you can see I’ve been able to consistently maintain views much higher than previous months. And if you compare that to my posting activity, that’s pretty good. I was not nearly as consistent in August – October, yet I still had higher views. Now, I feel more motivated than ever to add relevant content to continue to boost the traffic. After all, if this is a business, I have to treat it like one to see the fruits of my labor.

Chart showing my posting and traffic from February 2021 to October 2022. You can see a big increase when I started using RankMath in May 2022.

Changing my SEO strategy

I’m a fairly new blogger and only started my blog in February 2021 with relative inconsistency. The first couple of months I was struggling to get much traffic at all. I was trying to follow the normal blog marketing tips such as social networking and writing on a regular schedule. But it wasn’t really getting me anywhere until I started using RankMath.

Once I started focusing on keywords and using this tool to help me optimize my posts, I started to see growth! And it is something I want to continue. My goal is to bring all of my posts to a “green” level of optimization so they will start to rank more on Google search.

And I know a lot more now about keywords and keyword phrases so I can continue to make new content that is green from the start.

What I’ve learned from RankMath

If you’re a blogger and want to grow your traffic, I highly recommend you work with RankMath. Now I know so much more about keywords, URLs, links, titles, and so on to make my post as searchable as possible.

I still have more to learn, but I’m on a great path now to reach my ultimate goal of financial freedom!

Concluding thoughts

There is no one size fits all approach to SEO and if something doesn’t work for you, try switching it up. There are some best practices, but different ways of getting your information out into the Google universe.

Setting up your site using RankMath can boost traffic to your site and you can use a blogging calendar to boost traffic even more.

Best of luck on your blogging journey!

Posted in Goal, productivity

How Many Emails Should I Have in my Inbox? Important Advice

“How many emails should I have in my inbox?” is difficult to answer, but I have some advice. You see, there isn’t a single answer—the answer depends on your business and how many emails you send and receive each day.

When I ask people what their email box quota should be, they say “zero.” I guess that makes sense, right? Well, it really depends on what kind of marketing you’re doing. So here’s my answer to “How Many Emails Should I Have in my Inbox?”

A clean inbox is a manageable inbox

A clean inbox is a manageable inbox.

If you’re not sure how many emails you should have in your inbox, the answer is “less than you have now.”

If you’re looking for an INITIAL number to shoot for, try aiming for less than 50 unread messages at any given time. That may seem like a lot of emails, but if you’re using software like Gmail with its search functionality and folders, it’s actually pretty easy to stay under that number.

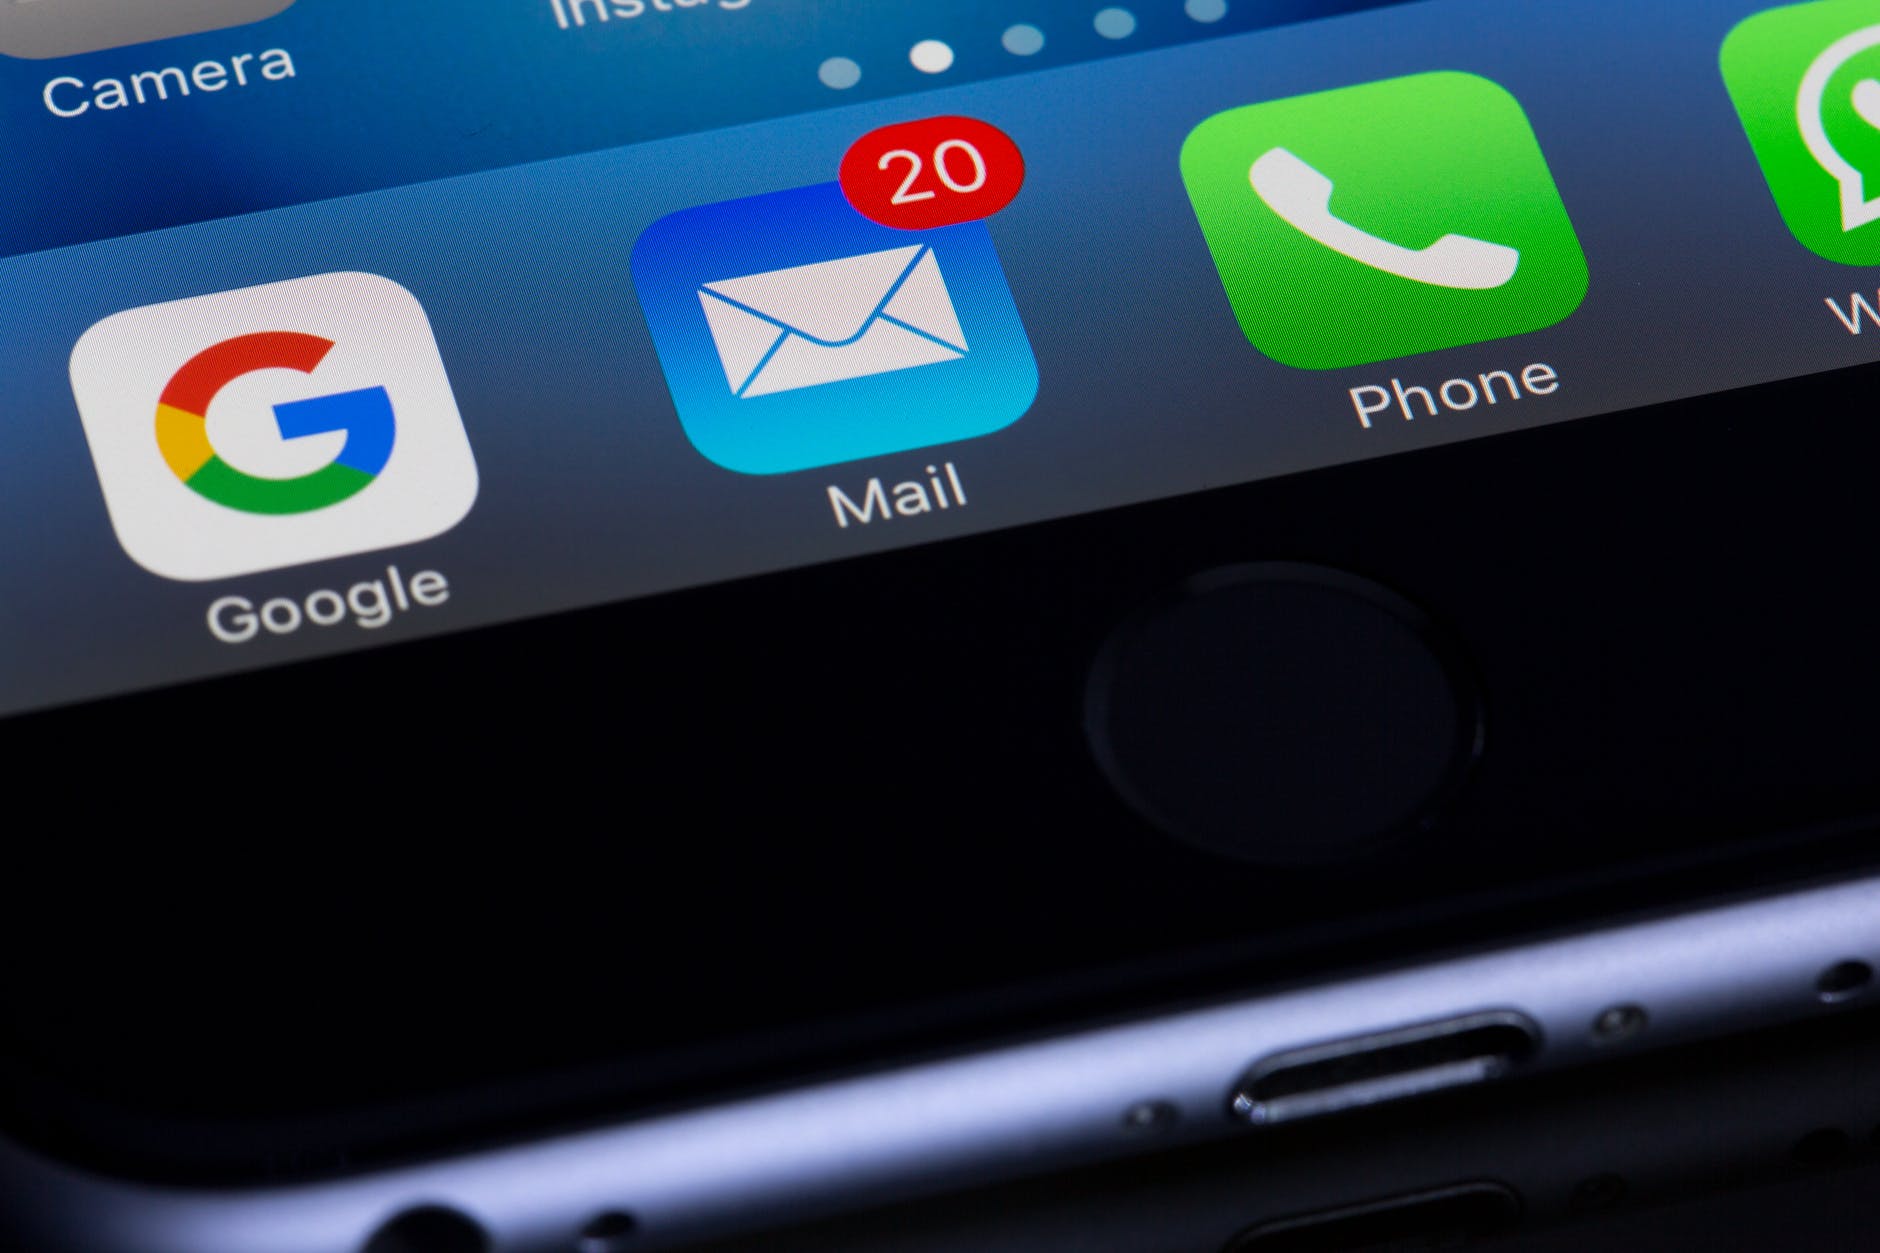
If you’re like most people, your email inbox is probably a source of stress. You know it’s full, but you don’t know what to do about it.

You have hundreds of unread messages, some important and some not so important. Some emails are stuck in the “Drafts” folder because you don’t have time to respond now, but you don’t want to lose track of them either. Others are buried in subfolders because they were sent by someone who isn’t in your address book and can’t be found with a search query. And so you continue to ask yourself: How Many Emails Should I Have in my Inbox?

The first step toward curbing the chaos is to get rid of as many unnecessary emails as possible — both those that don’t require action and those that aren’t worth keeping in your inbox at all. Once that’s done, focus on processing messages one at a time until everything is done or read.

black and gray digital device. How Many Emails Should I Have in my Inbox?
Photo by Torsten Dettlaff on Pexels.com

Your email inbox should have as few emails in it as possible

How many emails should I have in my inbox?

That’s a question that has perplexed inbox zero enthusiasts for years.

The answer is: as few as possible.

If you have a lot of emails in your inbox, you’re wasting time. You need to be able to scan quickly through your inbox and identify the important stuff — the stuff that requires action from you — and get rid of everything else.

Your email inbox should have as few emails in it as possible. This means that you are either deleting the emails that you don’t need, or moving them somewhere else.

If you have a lot of emails in your inbox, it’s time to clean things up. When I started my business, I had over 20,000 emails in my Gmail account. It was overwhelming and made me feel like I was drowning. I needed to change this!!

The magic number is 0

The magic number is 0 – for me. And if you’re like me, you should have no emails in your inbox.

You might be thinking, “How can I get my inbox to zero?” It’s not easy, and it’s not realistic for most people. But it’s a great goal to work toward.

For some people, if their inbox is full of hundreds of emails, they feel like they’re drowning in work that needs to be done. But if you can get your inbox down to zero (or close to it), then you’ve reached a place where you have control over your email and you know everything that’s going on. You don’t have to worry about missing an important message because it’s buried under piles of clutter.

You don’t have to worry about making decisions without all the information because other messages haven’t been read yet. And you don’t have to feel guilty about not responding quickly enough because there aren’t any messages in your inbox!

A clean inbox helps reduce stress and anxiety

A clean inbox is a happy inbox. It helps reduce stress and anxiety, which can improve your productivity and focus. This is why you often have the question: How Many Emails Should I Have in my Inbox?

The truth is that we’re all busy, but we’re also human beings who need to take care of ourselves and our mental health. And a clean inbox helps reduce stress and anxiety by making it easier to focus on what’s important when you need to focus on it.

When you have a clean inbox, you don’t need to worry about missing something important because there won’t be anything important left for you to miss!

The trick to keeping an empty inbox is deciding what to do with each email when it arrives

It’s easy to get an empty inbox, but it takes a little more effort to keep it that way. The trick is deciding what to do with each email when it arrives so you don’t have to keep asking the question: How Many Emails Should I Have in my Inbox?

Some people choose to delete all emails that are not work-related or personal. Others file emails in folders and delete only those they are sure they will never need again. Still others use the “flag” function on their email programs to place messages in a “to be dealt with later” category.

No matter how you choose to handle your incoming messages, there are some general guidelines that can help you maintain an empty inbox:

1) Do not spend time deleting emails unless they are spam or unwanted solicitations. If you have a legitimate reason for deleting an email, but do not know what category it fits into, leave it in your inbox until you decide what action is needed on your part.

2) Use filters on your email program so that certain kinds of messages automatically go into a particular folder without making you look at them first every time they arrive.

3) Choose one day each week (or even one day each month) when you will sit down at your computer and deal with any outstanding items in your inbox by filing them or deleting them permanently. Perhaps even daily if you receive a lot!

person holding a smartphone. How Many Emails Should I Have in my Inbox?
Photo by Solen Feyissa on Pexels.com

The more you stick with this practice, the more natural it will become!

If you’re still wondering: How Many Emails Should I Have in my Inbox? Fear not!

The more you stick with this practice, the more natural it will become!

You’ll find that when you’re at work, you’re not thinking about what’s in your inbox or what’s coming next. Instead, you’re focused on the task at hand.

If you have an email account with a lot of messages in it, it can take some time to get through them all and respond to them. This is where tools like email scheduling and email reminders can help.

Conclusion: How Many Emails Should I have in my Inbox?

Truth: The number of emails in your inbox is only important if it’s impairing your ability to do your job. It probably won’t kill you to have an overflowing inbox full of emails, but you’d definitely benefit from trying to get back down to somewhere between 0-50 emails in any given inbox.

Ultimately, the key to maintaining a clean inbox is setting realistic expectations and revisiting your inbox at frequent intervals. If you can do this, you should be able to keep your inbox in tip-top shape. By no means is it a perfect system, but it’s the best way to ensure that your emails are never overwhelming.

Posted in productivity

5 Simple Steps To Zero Inbox Life

Zero inbox life is possible. But, it takes organization, effort, and consistency.

Are you looking for a way to reduce the amount of time you spend on email? In this post, I am going to list 5 actionable steps you can take in order to reach that elusive mythical “Zero Inbox Life”.

The most important thing to remember is that it’s a process. You can’t just set up a system and expect it to work perfectly from day one. It will take some time to get used to, but once you do, boy does it make all the difference.

black and gray digital device.
Photo by Torsten Dettlaff on Pexels.com

1. Create an Actionable Inbox

If your inbox is full of emails that are not actionable (or even ones that are), you will never get to zero inbox. Unsubscribe from newsletters and social media feeds that don’t provide value for you or your business. Delete any emails that aren’t important (such as notifications from apps). Delegate tasks and projects to other people in your company or team (if applicable) so they can handle them instead of you.

2. Create rules

Once you’ve organized your inbox, create rules for any automated messages coming in that need immediate attention, such as receipts from online purchases or updates from social media accounts.

For example, if you receive an email from Amazon about a recent purchase, you can create a rule that automatically adds it to a folder called “Amazon Receipts” so that it doesn’t clutter up your main inbox view and alerts you when new messages arrive without having to check each time.

3. Create a To-do Folder

Create a “To Review” folder for each account where you’ll put mail that requires action from you later on (this is where most people end up dumping their messages).

Or, leave emails that need to be answered or followed up on directly in the inbox. And make sure those are the only ones there so you can move them to the proper folder when it’s completed.

4. Schedule Time To Process Your Emails

It’s tempting to just open up your inbox and start checking emails right away, but this can cause stress and overwhelm if there are too many emails waiting for you at once. Instead, schedule 30 minutes each day when you know there will be no distractions so you can focus on processing your inbox.

This way, you won’t feel like it’s taking over your life and affecting productivity levels throughout the day because it won’t be constantly pulling at your attention while you’re working on other things

Young woman making serious face while trying to create a zero inbox on laptop.
Photo by Andrea Piacquadio on Pexels.com

5. Move all emails from one folder to another folder (or archive)

You can move all emails from one folder to another folder by either using the ‘Bulk Move’ feature in Gmail or ‘Move to Folder’ feature in Outlook. This will help you declutter your inbox and organize your emails into folders according to their subject matter so that you can easily find what you are looking for later on if needed.

So close to Zero Inbox Life

You now have a system to follow. You know what works. Once you get started, you’ll immediately notice how much simpler (and faster) your online routine is. Pretty soon, getting to zero inbox will just be part of your normal routine. And, once that happens, life is bound to get a lot simpler.

Posted in Goal, productivity

6 Ways To Increase Productivity In Your Employees and Reduce Stress

How to increase productivity in your employees? This is an important question that requires a level of empathy and understanding. Business leaders around the world are constantly looking for ways to increase the productivity of their employees.

Whether it be by implementing new strategies, systems, or working conditions, improving the productivity of your team is an important priority, even during these tough economic times. So how exactly can that be accomplished while making sure to respect the human aspect of your employee?

Make sure that tasks are clearly assigned

Stress comes from uncertainty and confusion over what needs to be done and how it should be done. If you want to reduce the amount of stress in your workplace and increase productivity in your employees, make sure that each employee understands what his or her responsibilities are. When you give employees clear instructions and expectations, they know what they need to do and how they should go about doing it. This will help eliminate the kind of ambiguity that causes stress in the first place.

Create a positive work environment

Make sure that the workplace is set up in such a way that employees have what they need to be successful. This includes providing enough resources (time, money, equipment), making sure that the space is clean and welcoming, and keeping distractions at bay. You may also want to consider setting up a break room or other type of area where employees can go when they need some time away from their desks or computers. All of these work environmental factors contribute to the ability to increase productivity in your employees.

Set time aside for communication

Communication is key when running any business so make sure that you have regular meetings with each of your team members (at least once every week). These meetings should not be used only for checking up on progress but also for talking about personal issues as well as work-related problems. This will ensure that everyone feels comfortable talking about what’s going on instead of keeping it all bottled up inside until they explode later on!

Increase flexibility within the workplace

The nature of work has changed dramatically over the past decade or so. We no longer have 9-to-5 jobs that don’t require us to be online 24/7. We’re expected to respond and answer emails at all hours of the day, which only increases stress levels for everyone involved.

One easy way to help alleviate this problem is by giving your employees more flexibility with their schedules. Let them choose when they want to come into work or take extended breaks throughout their day instead of having set office hours where everyone has to be there at 8:00 AM sharp every morning (and then staying until 6:00 PM).

Provide opportunities for growth at every level – from entry-level positions up to management roles – so each employee has the opportunity to advance his or her career within your company as well as move up into higher positions within other organizations if they choose to do so in the future.

increase productivity in employees
Photo by Max Vakhtbovych on Pexels.com

Increase Productivity in Your Employees by Encouraging office wellness programs

You can start with something as simple as offering free fruit or snacks in the office kitchen, or even just having some games available for the staff to play during breaks. If your company has a gym or fitness center on site, consider offering discounted memberships to your employees. Healthier employees tend to be happier and more productive, so this can pay off in both ways!

Organize team outings and events outside the office. There are many fun things you can do together as a team outside of work hours — going bowling or playing miniature golf are great examples! Even if it’s just once a month, taking some time away from work will help relieve stress and increase overall happiness at work.

Prioritize employee health and wellbeing

Make sure your team knows what’s expected of them, and give them the tools they need to get the job done. For example, if you want to increase productivity in your employees, you may want to consider giving them more freedom in their personal lives so that they don’t feel overworked or stressed out at home.

Encourage self-care practices such as taking breaks or going for walks during the day rather than working continuously from 9am until 5pm. This will help them focus on their work more easily because they’re able to recharge their batteries when needed.

Takeaway: To increase productivity in your employees, you need to make them happy and feel like they are valued.

Posted in Goal

Starting on YouTube? 5 Helpful Tips to Get you Going

Starting on YouTube is hard work. You might see the successful entrepreneurs earning money and doing well, but that didn’t happen overnight. It takes time, strategy, mindset, and determination for your YouTube channel to do well. And most of all, consistency. I know this because I am still on my beginner’s journey to utilizing the full potential of YouTube.

So you’re looking to start a YouTube channel and you’re really excited about it! With all the tools available for making content for your channel, the sky is literally the limit. One thing that holds many people back from starting their own channel though is fear. Fear of what? Maybe it’s fear of rejection, fear of not being able to create the content, fear of not getting likes or views, fear of being a bad YouTuber…whatever it may be…I have five tips to help you get over those fears!

Don’t wait for ‘perfect’

The most important thing to remember is that your first video doesn’t need to be perfect. It’s easy to get caught up in making sure your lighting is just right, that you have the perfect backdrop and that you’re wearing the perfect outfit for your first video. But don’t let that hold you back from getting started — put something out there! Your first video doesn’t need to be perfect; it just needs to be good enough. People are now filming everything in real-time with YouTube shorts, live, Instagram, and Tik Tok.

There’s no such thing as being ready when you’re starting on YouTube. There are always improvements that can be made, but the only way to improve is by starting small and moving forward with what we’ve got. If you’re waiting for your channel or videos to be perfect before launching them out into the world, it might never happen. Take action now — even if it means just recording yourself talking into a phone while walking down the street — and move forward every time you’re ready with something new.

Be Yourself

Be Yourself and be relatable. Don’t sacrifice who you are as a person, but also be aware of what your audience wants. You should have fun while you’re creating content, but always keep in mind that they are watching because they want to see an authentic version of who you are.

Choose a niche or multiple niches. If you have more than one interest, choose one area that you want to focus on first and build upon it over time. If you decide later on that there’s another niche that interests you more than the first, go for it!

Create great content that stands out from the rest of the crowd. Don’t try to copy other people’s videos (and don’t let anyone else copy yours). Create something unique and share it with people who will appreciate it!

Don’t try too hard or take yourself too seriously — just be yourself!

starting on youtube
Photo by cottonbro on Pexels.com

Be Consistent

It’s important to keep posting on a regular schedule. This will help your audience know what to expect and connect more with you. When you’re starting on YouTube and consistent with your videos, people will start looking forward to them, and they’ll share their excitement with others who might be interested in what you’re doing.

When starting on YouTube, it’s important to respond to comments & questions in a timely manner. People love interacting with other people online, so take advantage of this by responding quickly when someone comments on one of your videos or asks a question! You’ll start building relationships with your viewers which will lead to more subscribers over time if they feel like they can relate with you and get answers from

Learn from Others

There are so many other YouTubers out there willing to share what they’ve learned along the way. Take the advice and use what works for you. Don’t be afraid to ask questions either! In fact, this is one of the best ways to learn from others — by asking questions!

In fact, some of these people may even be willing to work with you if they like what they see!

Take advantage of YouTube Analytics

One of the great things about YouTube is that it provides plenty of analytics that help you understand what’s working and what isn’t. Check out your watch time and view rate — these can help you determine what type of content people like most and what they don’t like at all. You can also see where viewers drop off during a video, which can help you identify areas where improvements need to be made.

And if you want to dive a bit deeper into SEO, then consider using a program like Tube Buddy to help even more:

https://www.tubebuddy.com/Tracydeetips (affiliate link)

It’s true—starting on YouTube may be a little nerve-wracking. There are so many things to keep in mind, and it can be hard to stay focused on everything you need to do as an aspiring YouTuber. But if you’re determined to get going on YouTube, don’t fret! As the saying goes, it gets easier with practice. Follow these tips, stay patient, and you’ll be making videos in no time.

Posted in Goal

Helpful Tips for a Digital Decluttering

Let’s do a digital decluttering! We often hear about the importance of decluttering our physical environment. But with the amount of time we spend online these days, the digital environment is just as important.

So how much time do people spend looking at a screen anyway? One report showed that the average American spends just over 7 hours a day on screens. That’s a huge chunk of our day. So, it is important to make sure that the screen time is organized and not chaotic.

Decluttering has many benefits, such as increased focus, a better lifestyle, and even a higher view of one’s self. I know when my physical environment is clear, I feel more at peace. This is often why I have to clean off my desk or table before even beginning to work.

messy office desk space. They need a physical and digital decluttering.
Photo by Sander on Pexels.com

Tips for a Digital Decluttering

Start with your offline digital space

Desktop

Think of the digital spaces as online and offline. So, starting with the desktop offline – Do you have documents saved on every inch of your desktop? Start by making folders and dragging relevant files into the folders. Then, you can group the folders or color-code them. I created a background on Canva that helps me group my folders.

Screenshot of an organized desktop to show a digital decluttering

Go through your applications folder

You can either manually remove files and applications you no longer need or utilize a service. Personally, I subscribe to Avast Premium, which declutters the files on my computer and recognizes which ones are taking up a lot of space.

Move to your online space

Email!

When you move to the online portion of your digital decluttering, make sure to spend some time on email. Some initial steps would be to archive all of your current messages. I wholeheartedly believe in inbox zero to the best extent possible. Unsubscribe from everything you don’t need.

Group tabs

Are you guilty of having a million tabs open on your desktop? Utilize resources to make it fewer tabs. One tip is to utilize a chrome extension called session buddy. Another option is to use the grouping feature in the Google Chrome browser.

Online/Offline

Another way I like to complete digital decluttering and organize is by creating multiple desktops. On a Macbook or PC, it is easy to separate your tasks into different desktops.

Moral of the story: as with your home, car, or office, keeping an organized digital space is an essential part of maintaining a productive groove.

Posted in Uncategorized

4 Reasons Why I Love Using Procreate on my iPad

I enjoy using Procreate on my iPad. It can be used to design so many things and get you in touch with your creative side. For example, I use Procreate to make some of the icons and symbols that go on my digital notebooks and to-do lists that I sell.

Also, check out my digital product freebies here!

Using Procreate allows you to create high-quality pieces of art without the price tag of some other programs

It’s easy to use. Procreate has an intuitive interface that allows you to quickly learn how to use the app. This means you can spend less time figuring out how things work and more time creating your artwork.

It’s got a wide range of tools. You can choose between different brushes, pencils, shapes, textures and more depending on what type of effect you’re looking for. There’s even an eraser tool that lets you remove mistakes easily before they become permanent!

You don’t have to be an artist to enjoy it. Procreate was designed with everyone in mind — whether you’re creating drawings for fun or wanting to create high-quality artwork for sale online or at conventions, this program will help make your vision come alive!

Here is an example of something that I drew:

using Procreate flower drawing
using procreate notepad page

I then added the icon to the bottom of this note page to sell on Etsy.

I also used Procreate to design the binder ring that I used in my digital planner. This is another way of using Procreate to make products for your business.

When my friend was visiting with her 4 kids, her 10-year-old absolutely loved drawing on the iPad Procreate app and he was really good at it too. It was a great program to distract him from the video games and YouTube he usually likes to do. He even wanted to get it on his own iPad and was working toward that.

For my job, I needed to insert my signature into several documents. It was super easy for me to create a digital signature on Procreate and then use the Magic Eraser app to get rid of the background.

Another awesome feature of using Procreate is the ability to create layers on top of layers. It’s an easy way to add texture and color to different designs. For me, it is a helpful tool not to delete things that I like when I try to write over something.

It’s a versatile, easy-to-use tool that contains many of the great features of Photoshop

One of the best things about Procreate is how easy it is to use. You can pick up this app and start using it right away without any training or tutorials. Everything you need is right there on the screen in front of you, with no extra steps needed to adjust settings or change toolsets (which can be very confusing in other programs like Photoshop).

The main screen has three main windows: your canvas, color palette and toolbars (plus extras like layers). There are also two menus at the top: one for changing toolsets and another for accessing settings like brush size and opacity. You can also access these menus by tapping on their icons in the toolbar at any time during your work session.

It has a wide variety of brush options

It has a wide variety of brush options that let you create anything from fine lines to thick blobs of paint or pencil marks. You can change the size, angle and other properties of each brush to get exactly the look you want.

You can customize your brushes

Another great feature is the ability to customize your brushes by tweaking any number of settings. You can adjust things like opacity, size, wetness (how much paint is applied), blend mode (how colors interact), angle (how much the brush can be angled), spacing (how far apart individual strokes are), scatter (the amount of variation in each stroke) and more! There’s no limit on what you can do!

I love the brushes on Procreate and you can easily create your own or purchase sets from other artists.

Using procreate is really user-friendly and has great tutorials available online

Procreate has a very nice user interface, making it easy to use for even the most inexperienced artist. The tutorials are great and there are several videos on YouTube from Procreate themselves.

Overall, this affordable app is so much fun to use! Check it out!

Posted in Uncategorized

Important Strategies for Scheduling Meetings In and Out of Your Organization

Strategies for scheduling meetings: Are you tasked with scheduling a lot of meetings or scheduling meetings with large groups of people with busy schedules? I’ve had to do both so I’ll share some of the strategies that I have used to simplify this process if possible.

I generally view these in 2 different categories. Scheduling within an organization can be a bit easier because you can utilize technology tools and systems to standardize meeting expectations.

However, this works best when everyone in the group is well-versed in the technology of the organization. Scheduling outside organizations requires clear directions so others can utilize the method you have set forth for that meeting.

Strategies for Scheduling meetings Within the organization

One of the easiest methods to schedule meetings within an organization is to share calendars through Gmail or Outlook. When I’m scheduling a meeting in Google Calendar in my organization, I can type in the guests’ names I need to meet with and view their available blocks of time to find a common time. You can change the settings to share as many or as few details as possible.

Doodle – This works for both inside and outside the organization. With Doodle, you can create a bookable calendar so people have to look at it when you’re available. You can also create events and list out dates and times so people can tell you when they’re available.

strategies for scheduling meetings
Photo by Pixabay on Pexels.com

Strategies for Scheduling meetings Outside the organization

When trying to schedule outside the organization, it is also possible to utilize Google and Outlook calendars if those people use them as well. I often get Google Calendar invites from many people not in my organization.

Another strategy is to use When2Meet, which allows potential meeting attendees to shade in all the blocks of time they are available. It then gets darker the more people are available at a given time indicating a better fit for a meeting. You can share the link with potential attendees and then choose the time when most people are available.

One of my colleagues just creates a Google Sheet with available times and has people put their names when they are available. It’s a similar process as When2Meet.

These are the main methods that I have used which I can personally recommend. However, there are so many other digital programs that you can use to manage your calendars and schedule meetings. This article shares the breakdown of 23 different programs you can use.

Ultimately, you want to choose the most time-efficient and user-friendly option available to you!